Saturday, April 23, 2011

Gimped! Blog: How To Edit Photos With GIMP 101 (Part 2)

Click here for Photo Editing 101
Suggested Prerequisites:
Layer Mask Gimp Video Tutorial
Layer Mode Gimp Video Tutorial
Adjusting Colors Using Gimp
Layers and Selections Gimp Video Tutorial
Suggested Items:
Wacom Tablet (For Shading and Masking)
My eBook on Layer Masks - This short and inexpensive book focuses on one thing -getting you insanely good at making Layer Masks.  If you get good at layer masking, you'll get good at Gimp.
In this lesson, I'm going to show you how to edit a photo using GIMP. This method will allow you to maintain complete control of the edits at all times.  Often times a I have found that I will make an adjustment to a photo, think I like the adjustment, continue to edit the photo, and 30 minutes later realize that edit I made ruined my photo.  The worst part?  There's nothing I can do at that point to take my edits back, shy of starting completely over.  I have found that manipulating layers, layer styles, and layer masks as much as possible is generally favorable to editing the photo directly in any way if at all possible.
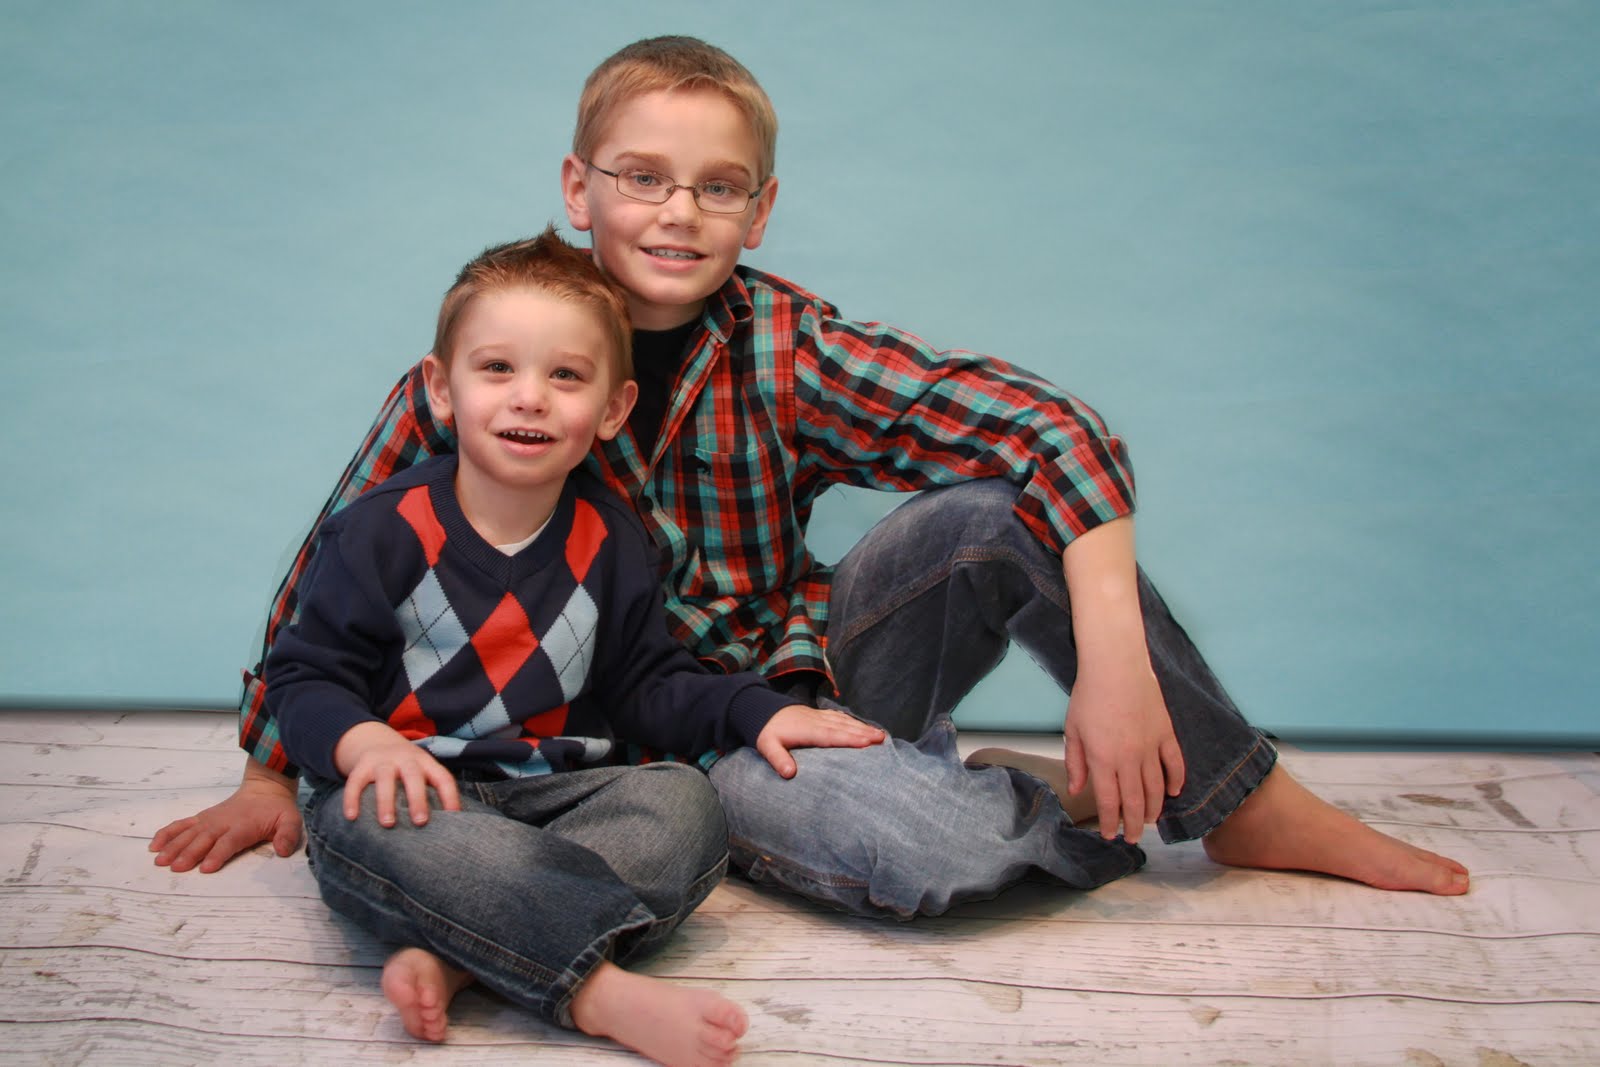
Start with this photo:
This photograph was taken by Jessica Jordan of Jordan Photography.  Her website can be seen Here
End with this photo:


Part 1:  How to use GIMP to Stretch The Backdrop
First, we're going to fix the backdrop by extending it to the edges of our photo.  This will be done by collecting a sample of the backdrop, and copying it over.
We'll start by adding the backdrop to the right-side.
Make a selection like the one below:
Notice the selection is off-center, and to the right.  This is because the slight shadow used on the right side will be flipped over in later steps to give the perfect shading.
Copy, and paste the selection.  Right click on the floating layer in the layer box, and click "new layer."  Name this new layer "backdrop"
Using the flip tool (shift+F), flip the backdrop layer horizontally.
Move the layer in the top-right corner.  Your photo should look like this:
duplicate the backdrop layer, and move the duplicated layer down 1 fill distance.  Continue to duplicate the backdrop layer until the right-side of your backdrop is covered.  Your photo should look something like this:
 
Right-click on the topmost backdrop layer, and click "merge down" until all of the backdrop layers are merged as a single layer.
right-click on the newly merged backdrop layer, and add a layer mask.  Fill the layer mask with white.
using the blend tool (L) create a gradient to blend the left side.  The photo should look like this:
The gradient effectively blends the edge in a realistic way.  Now we just have to brush the backdrop off of the boys.
using the brush tool and making sure that you're on the layer mask of the backdrop layer.  carefully brush the backdrop off of the boy.
Brushing black will hide the backdrop .  If you brush too much off, brushing in white will always bring the backdrop back.
Your photo should look like this:
 
Repeat the steps for the backdrop on the left side.
My photo now looks like this:
This next step is entirely up to you, although I felt it made the photo's backdrop look more realistic.  We're going to ad a small shadow at the bottom edge of our backdrop.
Create a new layer, name the new layer "backdropshadow"
Using the blend tool (Shortcut Key "L") change the settings to a black to transparent gradient, and the shape setting to bi-linear.
Create a thin gradient, and make it horizontal.  Don't worry about the exact location on the page, and don't worry if it doesn't line up correctly.  We're going to move it, and rotate it in place after the gradient is created.
using the move tool, drag your gradient to a position like so:
Placing the end of our gradient directly on top of the edge on the left-side of the photo gives us a point to rotate off of that will allow us to perfectly align the gradient with the photo.

Now that we have the gradient in place, let's rotate the gradient.  Click on the rotate tool (Shift+R)
Click on the gradient to put it into rotate mode.  Notice the circle with cross hairs in the center of the rotation box?  That marks the center of your rotation.  Click on that circle, and drag it to the far-left side of the screen, right on top of your gradient like so:
We want to rotate off of the endpoint on the far-left side of the photo as shown.
Rotate the gradient down so the photo now looks like this:
Now the the gradient is lined up, let's make the photo look real.
Set the layer mode to overlay.  Now it looks more shadow-like.
Right-click on the layer, and click "Add Layer Mask."
Brushing on the layer mask, brush off the areas of the shadow that should not be there.  (AKA the parts on top of the children.)
Set the layer mode to Overlay.  My photo looks like this:
Part 2:  How To Use GIMP To Edit The Faces
Next up, we're going to edit the faces to add more shadow to the children's faces.
Duplicate the background layer.  Name this new layer "Shadereference"
Click Colors>>>curves>>>adjust the curves as shown below.
Don't panic.  The photo is supposed to look like that.
You just created a reference for your facial shading.  Notice the different colors in the face?  Those are exaggerated versions of ever-so slight changes in the brightness of the person's face.  Using this layer as a reference, we can add the shadow we want on our "normal" photo.
Create a new layer, fill it with black, and name it "Faceshade1"
Add a layer mask to Faceshade1, and fill the layer mask with black.
Ensuring that you're brushing on the layer mask, and using the shadereference layer to help determine where the shadows are (hint, they're usually blue in this photo.) brush extra shadow into the proper parts of the boy with glasses's face.
My photo looks like this:
Not all of the different colors accurately represent different shades.  Frequently hide and un-hide the reference layer to get a full look at how the shadows will look.
Set FaceShade1 to Overlay, and adjust it's opacity to something you're happy with.  I set mine to 45, and it looks like this:
The shadows help add a little extra depth to the face.
Repeat this process with the young boy's face.
Here is how my layer looked after I masked the photo away.
Here is what I ended up with after setting my layer to Overlay, and adjusting the Opacity to 60
Part 3: How to Use GIMP to Enhance The Eyes
The eyes are always a critical part of a photo.  It is usually the first thing a person looks at when they look at a photo.  Making them pop often brings the photo out a lot.
Zoom in on the kid with the glasses.  Create a new layer, called "EyeWhiten1."  Fill the layer white, and set the layer mode to Saturation.
Add a layer mask to EyeWhiten1, fill it with black.
Make sure you're editing the EyeWhiten1 layer mask, and brush the whites of the eyes with white.
Use a soft brush when working on the eyes.
Adjust the opacity down to something you like.  I set mine to 50, and it looks like this:
The goal is to make the eyes appear more white by desaturating key parts of the photo slightly.
Create a new layer, name the layer "EyeHighlight1"  Fill this layer with white, and set the layer mode to Overlay.
Create a layer mask for EyeHighlight1, fill the layer mask with black.
Ensuring that you're working on the layer mask of EyeHighlight1, and that you're Using a soft brush, brush each iris white.  I ended up with this:
Feel free to adjust the opacity to something that works for you, although I left the opacity at 100%
Repeat these steps for on the younger boy's eyes.  I ended up with this:
Although the eye highlighting is far more effective when the eyes are well-lit, it can still help at least a little bit.
Part 4:  How to make the Final Touches
In the final touches, we're going to add light to a few spots that were underexposed, and darken the area around the photo to help pull your eyes to the subject.
Create a new layer, name it "LightenJeans" fill the layer with white, and set the layer mode to overlay.
Add a layer mask to LightenJeans, filling the layer mask with black.
Ensuring that you're editing the LightenJeans layer mask, brush the older boy's jeans with white.  If you make a mistake, remember that brushing with black will serve as an eraser.
I ended up with this:
 
Create a new layer, name it "Highlight."  Set the layer mode to Overlay, and fill the layer with black.
Create a layer mask for the highlight layer.  Fill the layer mask with white.
Select the blend tool (Shortcut Key L) and change it settings to to a white-to-black gradient.  Change the shape to radial.
Click and drag from the center of the boys, and drag out to the end of the older boy's foot.
Now that the editing is done, let's crop the photo to something more reasonable.
Select the Crop Tool (Shift+C)
In the crop tool options, make sure the "fixed aspect ratio" box is checked.  That will ensure that the photo will still print at the same ratio as the original size.
Click, and drag a box.  Move the box, and adjust the handles until your photo is set to something that you like, and press enter.
My final photo looks like this:
What do you think?  How would you have edited this photo differently?

Thursday, April 7, 2011

Gimp Tutorial - How To Use Gimp to Create Beautiful a Sun Ray Photo

In this lesson, I'm going to show you how to use GIMP to take a photo of the sun, add some sun rays to the photo, and change the color to make the photo look more dramatic.

Suggested Prerequisites:
Layer Mask Gimp Video Tutorial
Layer Mode Gimp Video Tutorial
Adjusting Colors Using Gimp
Layers and Selections Gimp Video Tutorial
Suggested Items:
Wacom Tablet (For Shading and Masking)
My eBook on Layer Masks - This short and inexpensive book focuses on one thing -getting you insanely good at making Layer Masks.  If you get good at layer masking, you'll get good at Gimp.


In this how to, we will start with this photo:
This beautiful photo was taken in Dun Laoghaire.
...and we will End with this photo:
As if the photo actually needed editing...although a few color effects really do go a long way
Suggested Prerequisites
Understand Layers
Learn about layer modes and layer masks
Understand the color menu
Learn my 5 Photo Editing Principles
Suggested Items
Wacom Tablet (for masking)
Gimp reference manual
Part 1: How To Use GIMP to Create the Sun Rays.
Using a pretty cool technique, I will show you how to create sun rays (or beams) without using special brushes, complicated gradients, or any stock photo.
Duplicate the background layer. Name that layer "Sun Rays."
Click "Filter>>>Blur>>>Motion Blur."
Set your settings something like what I have shown below.
The important thing is to make sure the center of the blur is set properly. You have to type the coordinates into GIMP. To get the coordinates, simply move your mouse over where you want the center of the photo to be, and check the bottom-left corner of your GIMP screen. The coordinates will be displayed there.
Note that this step often takes a long time to render (for me, it took GIMP about 10-15 minutes.)
My photo now looks like this:
It's pretty apparent where the rays are going to come from, right?
Click "Colors>>>Curves" adjust the curves something like what I have below:
Oh S-Curve...you're so awesome.
I ended up with this:
Notice a lot of the information is now washed out, but the detail in the sun rays are starting to really shine through (no pun intended.)
Filters>>>Edge Detect>>>Edge. Set it to "Sobel" and "10."
And just when you thought you understood what was going on, we go and do this. Don't worry, the black won't be a factor for long,
Click on Colors>>>Curves
Create a curve that looks something like this:
My photo turned out like this:
Now we have a very good contrast on our sunbeams...although they're a little too sharp. Time to blur them a bit.
Click Filter>>>Blur>>>Gaussian Blur
Blur the entire photo at a value around 25.
Set the sun rays layer to the layer mode "Overlay."
You should end up with something like this:

That looks pretty good, but we lost a lot of our photo as a result. Time to add a layer mask.
Right click on the Sun Rays layer>>>click "Add Layer Mask" Set the mask mode to White.

Reset your color palette by clicking on the black and white boxes in the bottom-left corner of your toolbox.
Switch the foreground and background colors on your palette by clicking the arrows beside the color palette (or by pressing the X key.)
Choose the Blend Tool (Shortcut Key: L)
In the tool options window, change the gradient to "radial"
Click and drag a gradient from the center of the sun outward. This will cause the layer to gradually fade away in the darker areas further from the sun. My photo looks like this:
The gradient in the layer mask gives us the best of both worlds.
Part 2: How to use GIMP to Dramatize the photo
Now that we have our sun rays in place, it's time to give the photo that "golden sky" look, as well as pull out some of the shadows in the clouds and water using a technique that differs from the usual "curve adjustment" concept shown in previous tutorials.
Duplicate the background layer. Name the duplicated layer "Dramatize"
Set the layer "Dramatize" to overlay
Ensuring that you're editing the Dramatize layer, click colors>>>desaturate.
Click Filters>>>>enhance>>>unsharp mask
Play with these settings to something you like. Mine were set up with these settings:
Radius: 26.3
Amount: 4.37
Threshold:0
Set the dramatize layer to overlay, and adjust the opacity to something you like. My overlay is set to 37.5, and looks like this:
Using a combination of overlay, and transparency, we're able to sharpen the image without giving up too much detail.
Create a new layer. Name that new layer "Glow Color"
Choose the Blend Tool (Shortcut Key: L)
Set your foreground color to a light yellow, and your background color to a bright orange (kind of like the colors found on a piece of candy corn.)
In the tool options window, change the gradient to "radial"
Click and drag a gradient from the center of the sun outward. This should create a gradient that looks something like this:
Note the location of the yellow glow. It is in-line with the sun.
Set the layer mode to "Hue"
Adjust the opacity to something that you're happy with. (I set mine to 40, and came up with this:)
The purpose of this layer is to pull some (not all) of the blue out of the sky.
Duplicate the glow color layer. Name the duplicated layer "Sun Color"
Set the opacity of the sun color layer to 100.
Right-click on the sun color layer>>>click "add layer mask"
Set the layer mask to "Grayscale copy of layer"
Make sure you're editing the sun color layer mask, and click Click colors>>>brightness-contrast
adjust the contrast to something you're happy with. Mine is set to these settings:
Brightness: -61
Contrast:100
And my photo looks like this:
My photo...it's...GOLD! Too gold.
Adjust the opacity to something you like. Mine is set to 25 and looks like this:
That's a little better. Now for the final touch, the lens flare.
Part 3: How To use GIMP to Add a Lens Flare
This final step is not hard to do, since GIMP automates the lens flare creation. The only problem is GIMP has to put the lens flare on the same layer as your background layer. To help better preserve the data, we're going to duplicate your background layer and add the flare to the duplicated layer, that way if you decide that you don't like the flare at a later point, you can always delete the duplicated layer and still use the original. It's a good practice in general to always keep the original image on a layer, and only edit duplicates. Sometimes progress requires looking at where you came from.
That being said, start by duplicating the background layer Name the duplicated layer "Lens Flare Background"
Ensuring that you're editing the lens flare background layer, click filters>>>light and shadow
In the window, position the lens flare inside of the sun, so that the flare appears to be coming from the sun.
Click OK.
I ended up with this:
What do you think? What would you have edited this photo differently?

Wacom Tablet

In my Gimp Tutorials, I frequently use Wacom Tablets. Here is an awesome wacom tablet I recommend using.
A Wacom tablet will enhance your GIMP photo editing experience by offering a pressure-sensitive touch that translates to varying transparency when making brush strokes in GIMP.

Gimp Reference Manual

I highly recommend getting this Gimp book to use as a reference manual in conjunction with my tutorials. This book will explain how the tools I use work. My tutorials will give you practical applications for the tools shown in this book.